Create a Keyboard Shortcut to Open Any App on Mac - SnapHotkey
Three steps to create a keyboard shortcut that opens any application on Mac. Press Left Cmd+1 to launch Finder, Right Cmd+2 to launch Notion — no scripting required.
You have twelve apps open. To get to Slack, you press Cmd+Tab and hold, watch the strip, count to eight, release. Or you swipe down to the Dock, find the icon, click. Or you press Cmd+Space, type “sl”, wait, then Return.
Each path takes two to three seconds. Multiply by 50 switches a day and that’s two minutes of friction — every day, every year. Worse: each switch breaks your flow.
There’s a better way. One key, one app, instant. This guide shows you how to create a keyboard shortcut to open any application on Mac in three steps using SnapHotkey — no scripting, no Automator, no system extensions.
Meet SnapHotkey — The Simplest Way to Set a Shortcut to Open an Application
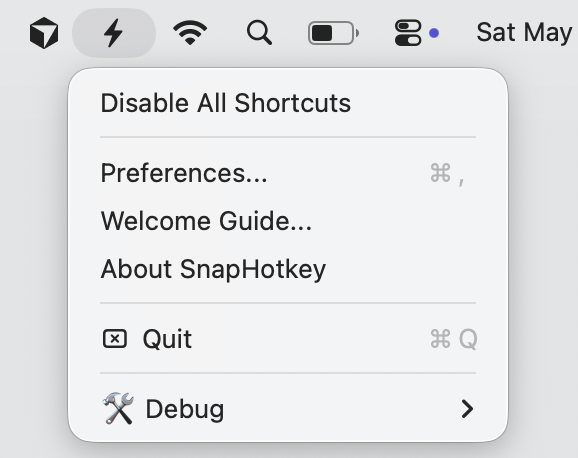
SnapHotkey is a Mac app whose only job is binding keyboard shortcuts to applications. No scripting. No JSON config files. No third-party automation framework. You open the menu bar, click Preferences, map a key to an app, and it works system-wide — even when SnapHotkey itself isn’t in focus.
SnapHotkey lives in your menu bar — no Dock clutter — and starts at login. Once you’ve configured your shortcuts, you’ll never open the app again. The keys just work.
Three steps.
Step 1: Install and Open SnapHotkey
- Download SnapHotkey from snaphotkey.com/en/download
- Open the disk image and drag SnapHotkey into your Applications folder
- Launch it — a lightning bolt icon appears in your menu bar
- Click the menu bar icon and select Preferences…
On first launch, macOS will ask for Accessibility permission. This is required for any app that listens for global keyboard shortcuts — without it, no third-party hotkey tool can work. Grant access in System Settings → Privacy & Security → Accessibility.
That’s the entire installation. SnapHotkey doesn’t require kernel extensions, doesn’t ship with a background service you can’t see, and doesn’t add anything to your Dock.
Step 2: Add Your First Shortcut — Left Cmd+1 → Finder
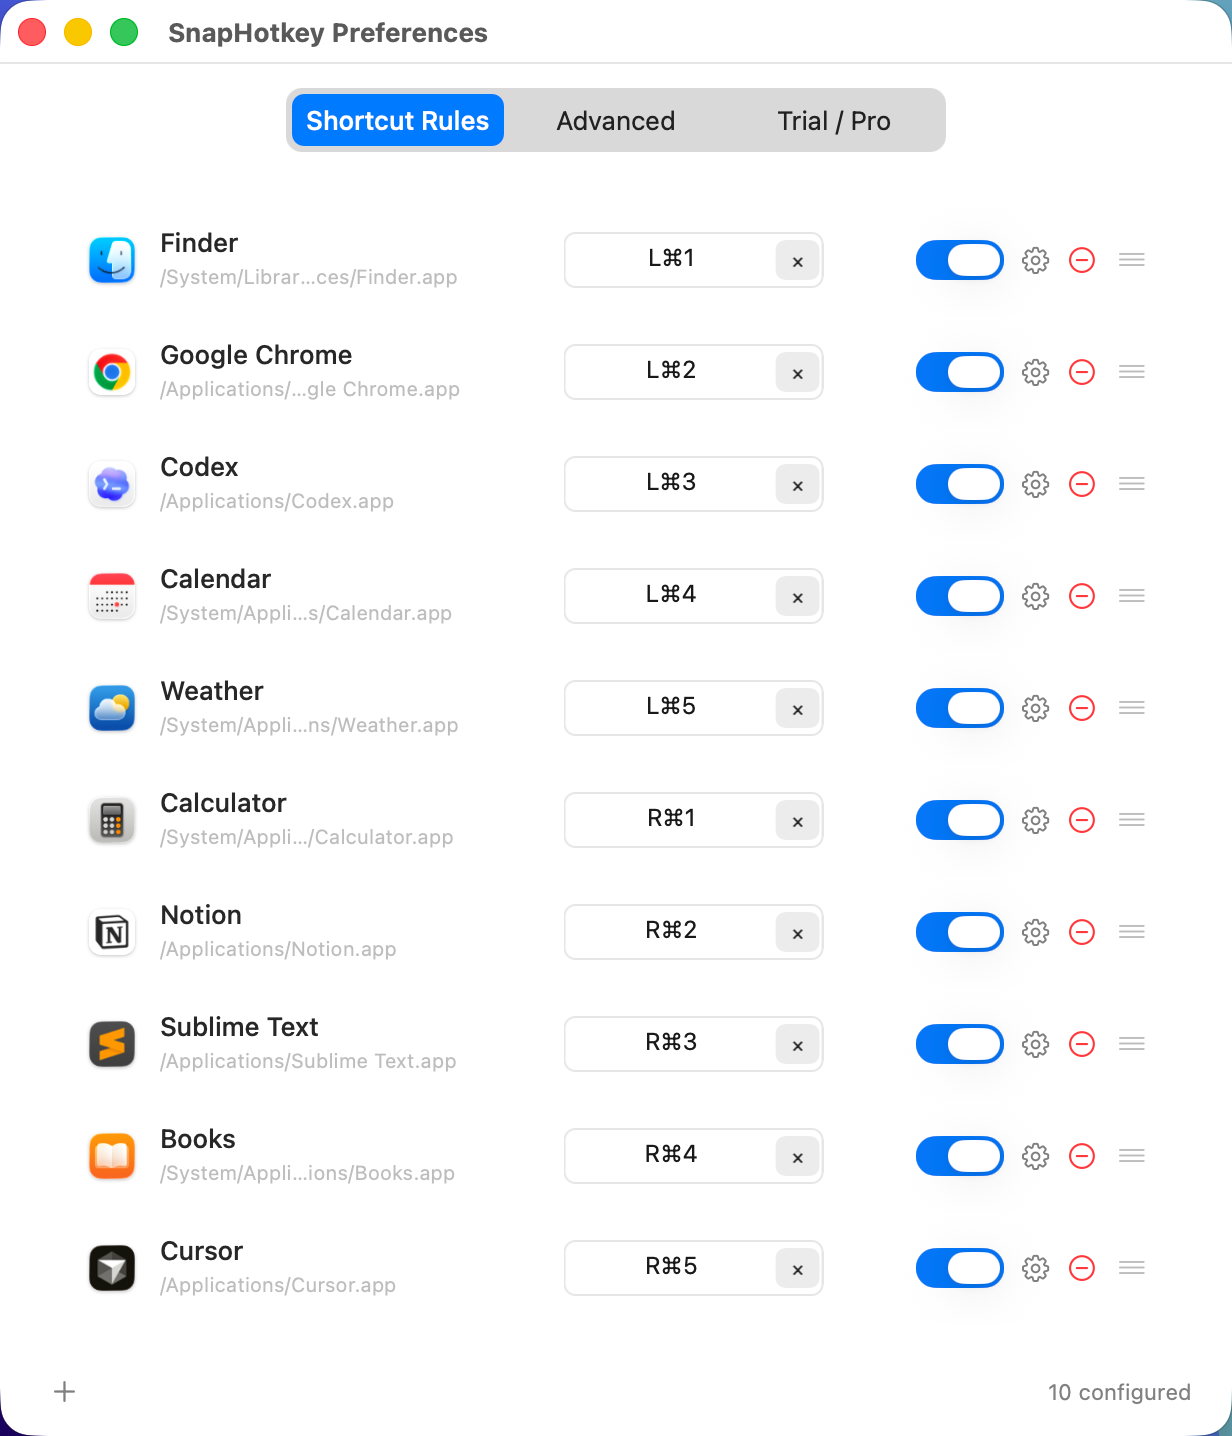
In the Preferences window you land on the Shortcut Rules tab. This is where every keyboard binding lives. Each row is one rule: an application on the left, a key combination in the middle, and an on/off toggle on the right.
Here’s what mine looks like after a few minutes of setup:
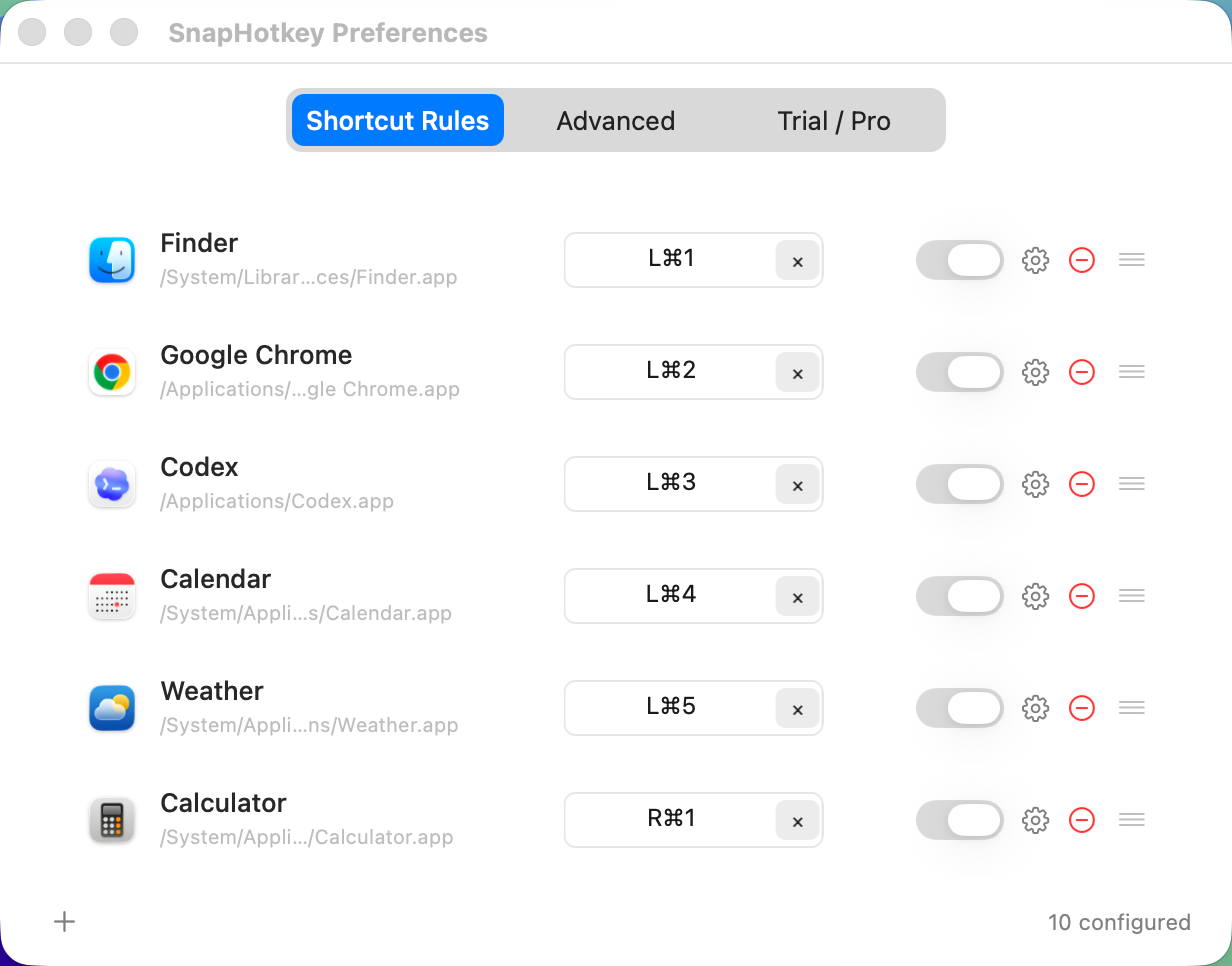
Look at the first row: Finder mapped to L⌘1. That L⌘ means Left Command — specifically the Command key on the left side of your spacebar. SnapHotkey tells the left and right Command keys apart, so Left Cmd+1 and Right Cmd+1 are two different shortcuts — effectively doubling your shortcut space from ten number slots to twenty.
To add your own rule:
- Click the + button at the bottom-left of the rules list
- Pick the application you want from the file picker — say, Finder
- Click into the shortcut field on the right side of the row
- Hold the Left Cmd key and press 1, then release
- Make sure the toggle on the far right is on (blue)
That’s the entire workflow. There’s no save button — changes apply the moment you set them.
If you want to change a binding later, click the shortcut field again and record a new key combination. If you want to disable a rule temporarily without deleting it, just flip the toggle off.
Step 3: Test Your Shortcut
Close the Preferences window. Now press Left Cmd + 1.
Finder is in front. Less than a tenth of a second. No animation, no Dock bounce, no thought.
That’s the whole loop. Press the key, get the app.
Try it from a different starting point. Open Chrome, get something on screen, then press Left Cmd+1. Finder is in front again. From any app, any state, the shortcut works. That’s what “global” means — SnapHotkey runs in the background and intercepts the keystroke before your foreground app sees it.
A small detail worth knowing: if Finder is already open, SnapHotkey brings the existing window forward instead of opening a new one. If no Finder window exists, it opens a fresh one. This is the behavior most people want — surface what’s there, only spawn new when needed.
Step 4: Build Your Whole Workflow
One shortcut isn’t a workflow. Ten is.
Here’s a mapping that covers most of a developer’s day:
Left hand (Left Cmd + number) for the apps you reach for constantly:
L⌘1— FinderL⌘2— ChromeL⌘3— CodexL⌘4— CalendarL⌘5— Weather
Right hand (Right Cmd + number) for the next tier:
R⌘1— CalculatorR⌘2— NotionR⌘3— Sublime TextR⌘4— BooksR⌘5— Cursor
Ten apps. Ten keystrokes. Your whole stack under your thumbs.
The trick to making this stick is organize by hand or by category, not by alphabetical order or app importance. A few schemes that work in practice:
- Hand-based split: Left = reference apps (calendar, weather, calculator). Right = work apps (editor, terminal, browser).
- Workflow split: Left = communication (Mail, Messages, Slack). Right = production (IDE, design tool, browser).
- Frequency split: Left = top five most-used. Right = next five supporting cast.
Pick one. Stick with it for a week. The muscle memory locks in within days. After two weeks you’ll forget what the Dock icons even look like.
A Few Tips for the First Week
A handful of small things that make the difference between “I’ll try this” and “I can’t go back”:
- Don’t bind too many at once. Start with three or four apps you actually use multiple times an hour. Add more after a week, once those four feel automatic. Trying to memorize ten new bindings on day one is how this fails.
- Use the same number for the same role across machines. If
L⌘1is Finder on your work Mac, make it Finder on your personal Mac too. Cross-machine consistency is what builds true muscle memory. - Skip
Cmd+1throughCmd+9if you live in a browser. Those conflict with Chrome’s tab-switching shortcuts. UseLeft Cmd+ number orRight Cmd+ number — the L/R distinction sidesteps the conflict entirely while keeping the number-key intuition. - Map your toggle apps to the dominant hand. If you’re right-handed and Slack is what you peek at most often, put it on a Right Cmd shortcut so your peek motion is one quick reach.
Want More? Open Apps With Specific Parameters
Once the basics are working, SnapHotkey has a less obvious capability: a shortcut doesn’t have to just launch an app — it can launch the app with specific parameters.
For example, instead of R⌘2 opening Chrome to whatever was last loaded, you can make it open Chrome directly on a specific URL. Press one key, land on google.com.
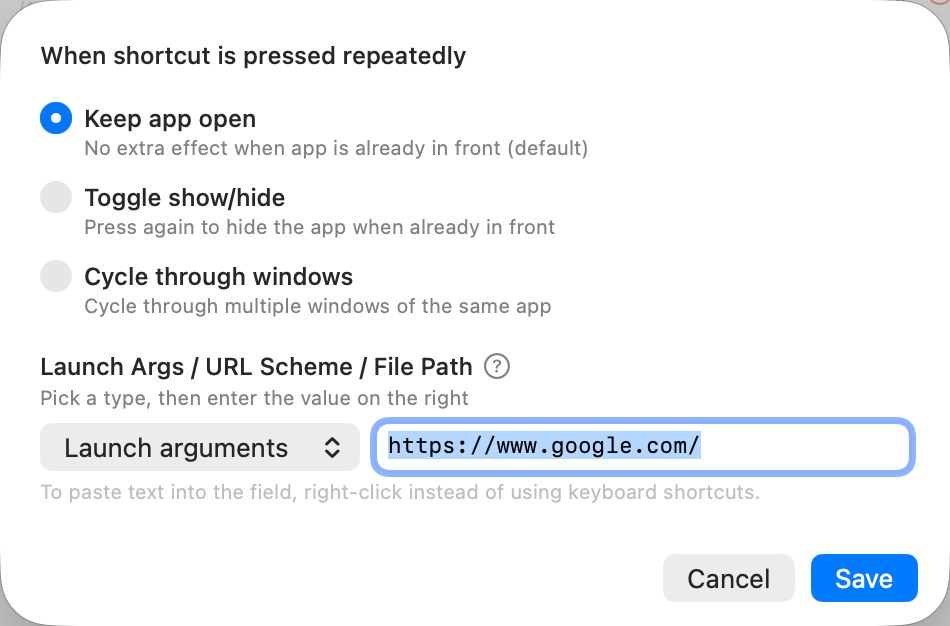
The same mechanism opens:
- A specific Notion page (via URL scheme — one key to your daily notes)
- A specific folder in Finder (via file path — one key to your Downloads folder)
- Chrome with a profile flag (via launch arguments — one key for your work profile, another for personal)
- An Obsidian vault directly (via URL scheme — one key per vault if you maintain several)
You don’t need any of this to get value from SnapHotkey on day one. But when you do need it later, it’s a few clicks in the per-rule settings — not a Lua script or a JSON config file you have to look up syntax for.
Try SnapHotkey Free for 15 Days
SnapHotkey comes with a 15-day full-featured trial — every feature unlocked, no watermarks, no limits, no credit card up front. If it changes how you work, the full version is $9.99 one-time. No subscription, no ongoing cost, free updates on the major version you buy. macOS 10.15 (Catalina) and later.
Wrap Up
Three steps to create a keyboard shortcut to open any application on Mac:
- Install SnapHotkey and open Preferences
- Map a key combination to an app (start with
Left Cmd+1→ Finder) - Press the key and watch the app appear
After a week, you’ll have ten apps under your thumbs and stop reaching for the Dock entirely. After a year, you’ll have saved over ten hours and a lot of small frustrations.
Give it the 15 days. If your hands don’t go back to it on day 16, uninstall it. They will.